Several days ago I decided to try GitHub Pages with Jekyll as my main blogging platform. Of course the biggest advantage of Github is that there is no hosting cost. Besides, a static site is enough for me and Jekyll is easy to start with.
Installation
The installation of Jekyll is simple. First cd into a directory where you want to have your blog folder and do the following to install and start Jekyll server:
~ $ sudo gem install jekyll
~ $ jekyll new BlogFolder
~ $ cd BlogFolder
~/BlogFolder $ jekyll serve
You will see a line with the server address. Open a browser and go to this address you will see your raw blog site.
Configuration and changing the theme
Information about the sites can be configured in the _config.yml file. You can modify the page element files in the _includes folder and define the layout in the _layouts folder. You can also apply to a different Jekyll theme.
Add category / tag page(s) for post index
There will be only two steps to add a single page for each category. If you have already specified the Category when creating your post, you just need step 1.
Step 1. create a separate file for each category (for instance tech.html) with the following code:
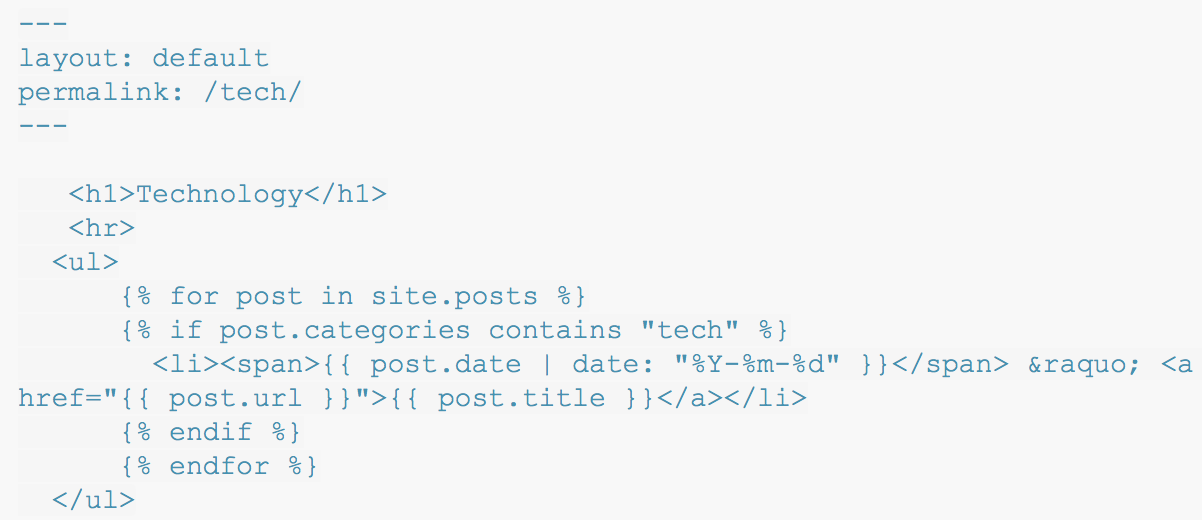
Step 2. Add Category in the YAML Front Matter of your posts.
---
layout: post
title: "My favourite iOS apps"
categories: tech
---
Afterwards, you can add links on your site for these category pages like this:

Create a single page with all tags
If you have several tags (as many people do) and you want to have a single index page for all tags, the principle is the same but you have to do more hand work. Everytime you have a new tag, just add it to the tag’s index page and order all tags manually. It will look like this:
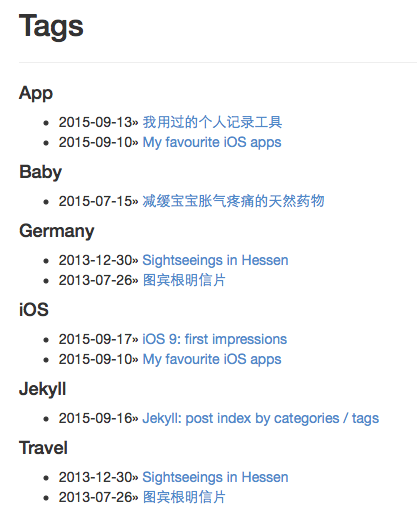
OR
Here is another solution “Separate pages per tag/category with Jekyll (without plugins)”. Still you need to create a single file for each tag.